Reading Nested XML Data in SSIS
SSIS is really good at reading in XML data, breaking it apart, and building out your rows. Let’s look at an example of how this all works together. First, here is our XML document.
<people>
  <person>
    <name>
      <first_name>Maddox</first_name>
      <middle_name>Xavier</middle_name>
      <last_name>Spears</last_name>
    </name>
    <addresses>
      <address>
        <line1>885 Whiteman Street</line1>
        <line2>Pleasantville, NJ 08232</line2>
      </address>
      <address>
        <line1>4229 Williams Mine Road</line1>
        <line2>Newark, NJ 07102</line2>
      </address>
    </addresses>
  </person>
  ...
</people>
We have a list of people. Each person has a name and a list of associated addresses. The name is broken out into its component parts, and each address is broken into line1 and line2.
Let’s create our tables to store this data. We will need a Person table and an Address table.
create table [dbo].[Person] (
  [PersonId] bigint not null,
  [FirstName] varchar(50) null,
  [MiddleName] varchar(50) null,
  [LastName] varchar(50) null,
  [InsertedDate] datetimeoffset not null default sysdatetimeoffset()
);

create table [dbo].[Address] (
  [PersonId] bigint not null,
  [Line1] varchar(50) null,
  [Line2] varchar(50) null,
  [InsertedDate] datetimeoffset not null default sysdatetimeoffset()
);
Step 1: Creating a new batch
This is a personal preference, so you can skip this step if you’d like.
Start by creating a Batch table. This will store the timestamp and filename for each time we run our SSIS job. Yes, this is overkill for a demo, but it is a good idea to teach good SSIS habits, too. We will also store the BatchId on each record.
-- Create the new Batch table.
create table [dbo].[Batch] (
  [BatchId] int not null identity(1, 1),
  [StartTime] datetimeoffset null,
  [Filename] varchar(200) null,
  constraint [PK_dbo.Batch] primary key clustered (BatchId)
);

-- Create a new stored procedure for creating a new batch entry.
create procedure [dbo].[InsertBatch]
  @startTime datetimeoffset = null,
  @filename varchar(200) = null
as
begin
  begin transaction;

  insert into dbo.Batch (
    StartTime, Filename
  ) values (
    @startTime, @filename
  );

  select top (1) BatchId, StartTime, Filename from dbo.Batch where BatchId = scope_identity();

  commit transaction;
end

-- Add BatchId column to Person.
alter table [dbo].[Person] add [BatchId] int not null;

-- Add BatchId column to Address.
alter table [dbo].[Address] ass [BatchId] int not null;
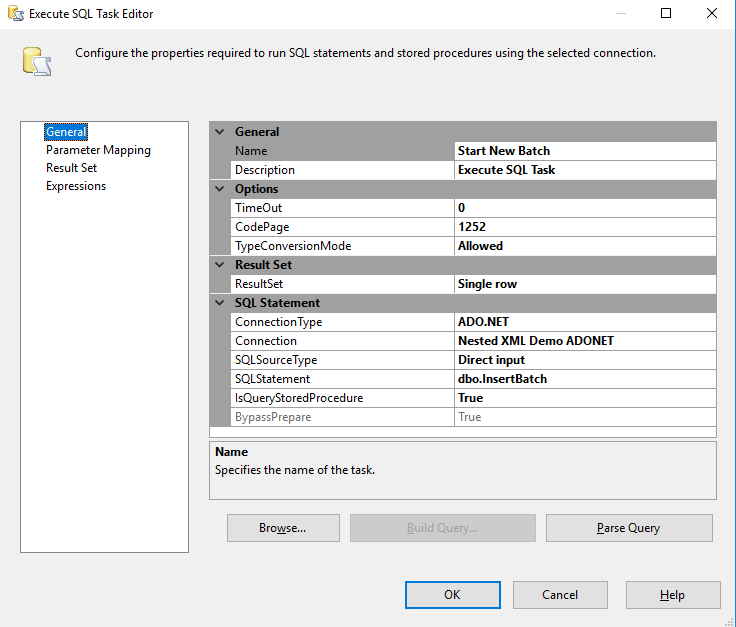
Our first SSIS step is to create a new record in this table and save the ID. Add a new Execute SQL task to your workflow. I have already added an ADO.NET connection to my database. My SQL task will use this existing connection.
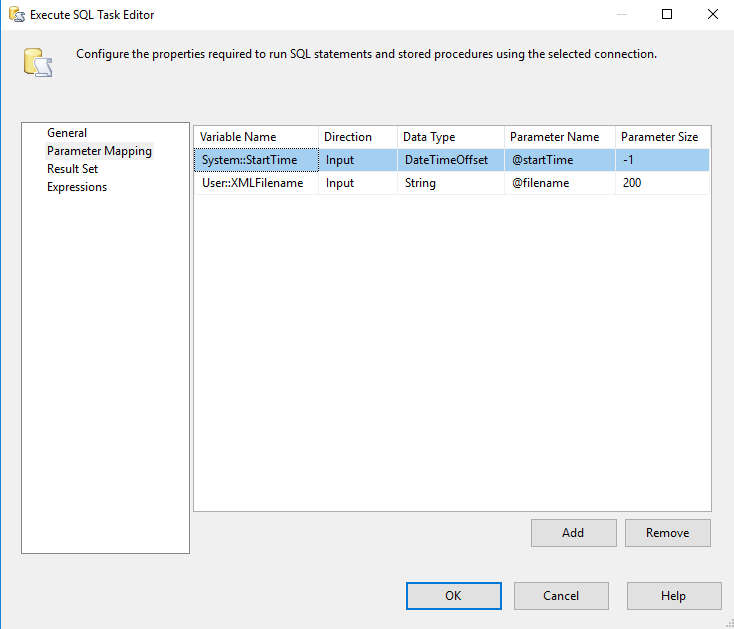
Next, set the input parameters for the stored procedure - StartTime and Filename.
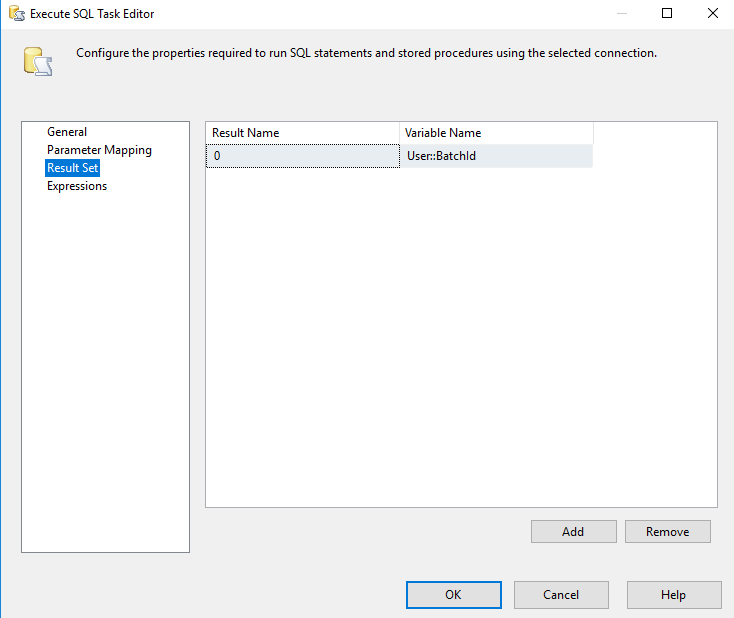
Finally, we need to capture the result set. Create a user variable called BatchId, and save the result to that variable. We set the Result Set to “Single Row” on the general page. Here, the BatchId is the first value returned (0-indexed). We will use it later when we insert our XML data into tables.
Step 2: Delete the existing data
This one is easy. We want to prepare our tables for incoming data. Create a procedure that will wipe away all existing data.
create procedure [dbo].[TruncateTables]
as
begin
  begin transaction;
  delete from [dbo].[Address];
  delete from [dbo].[Person];
  commit transaction;
end;
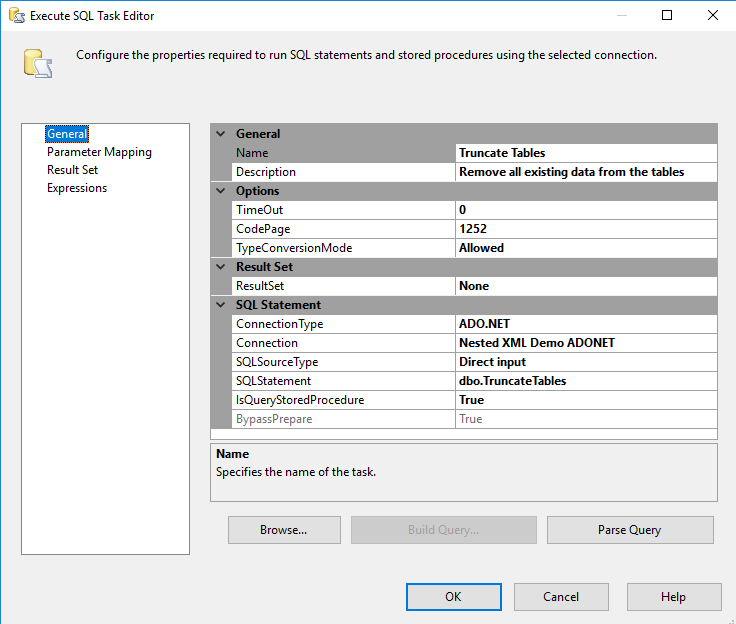
Call this procedure with an Execute SQL task. This time, there are no parameters or results.
Step 3: Fun with XML files
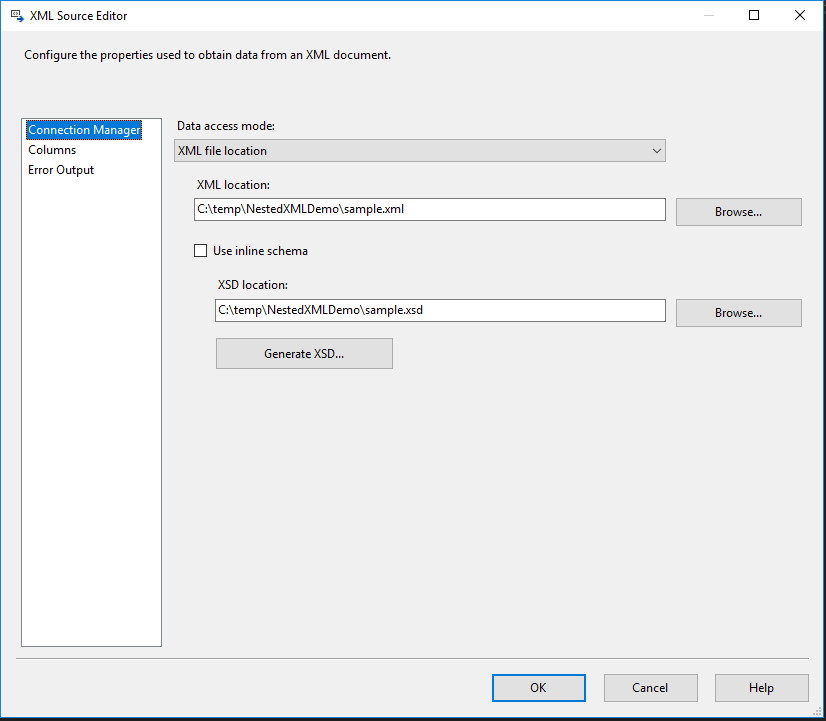
Now that we have properly prepared our tables, we are ready to read our file and insert new rows. This is done with a Data Flow Task. Point your file connection to the correct place on your drive. Hit the button for “Generate XSD…”.
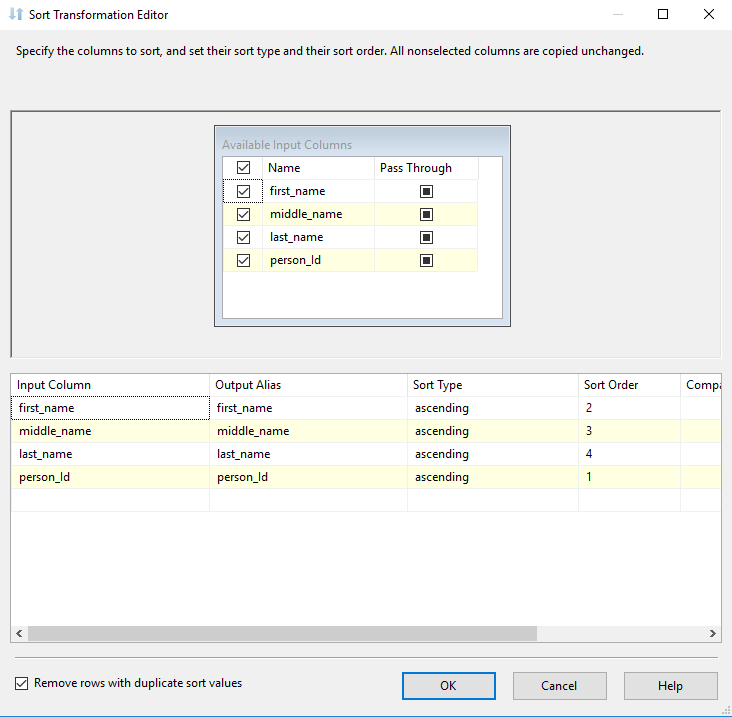
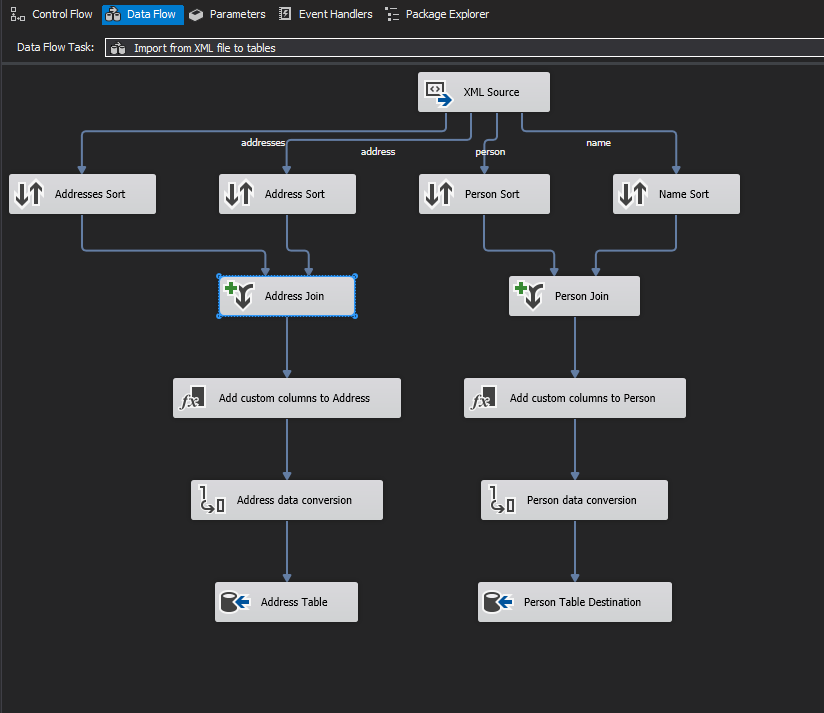
This will scan your XML and read every node. It will also create appropriate IDs so nodes can be linked. Next, data must be sorted. Every node must be sorted, and this XML has four such nodes - person, name, addresses, and address.
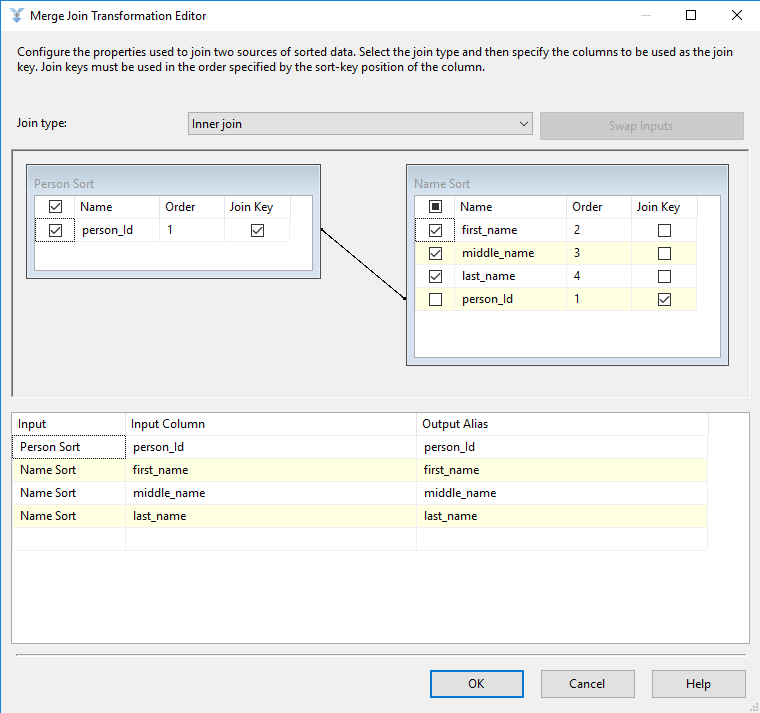
After all data has been sorted, we are ready to create joins. We need a join to turn four types of nodes into two tables. The Person join combines the person and name node types, and it looks like the following.
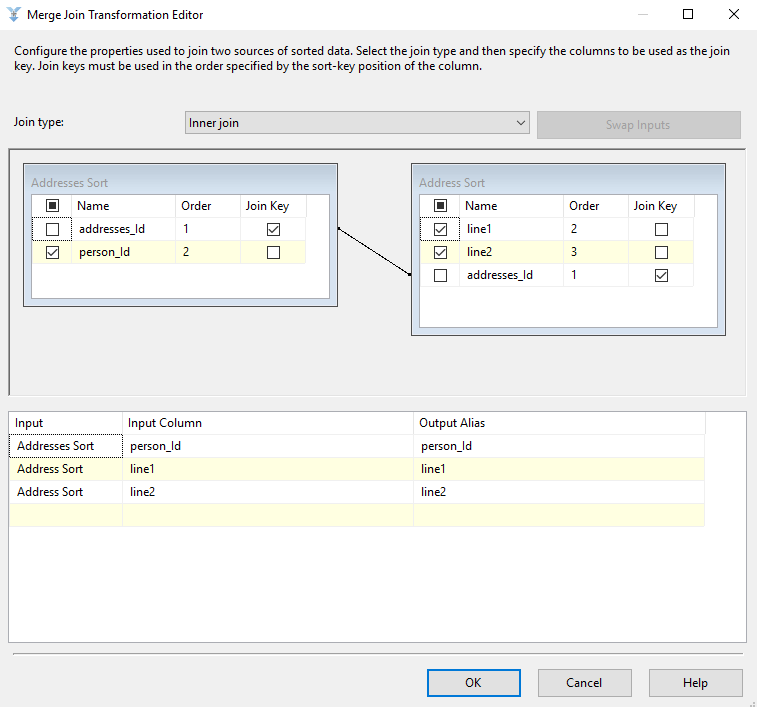
And here is the Address join. This combines the addresses and address nodes. Note that the addresses node contains the person_ID value, which we will need to link addresses to people.
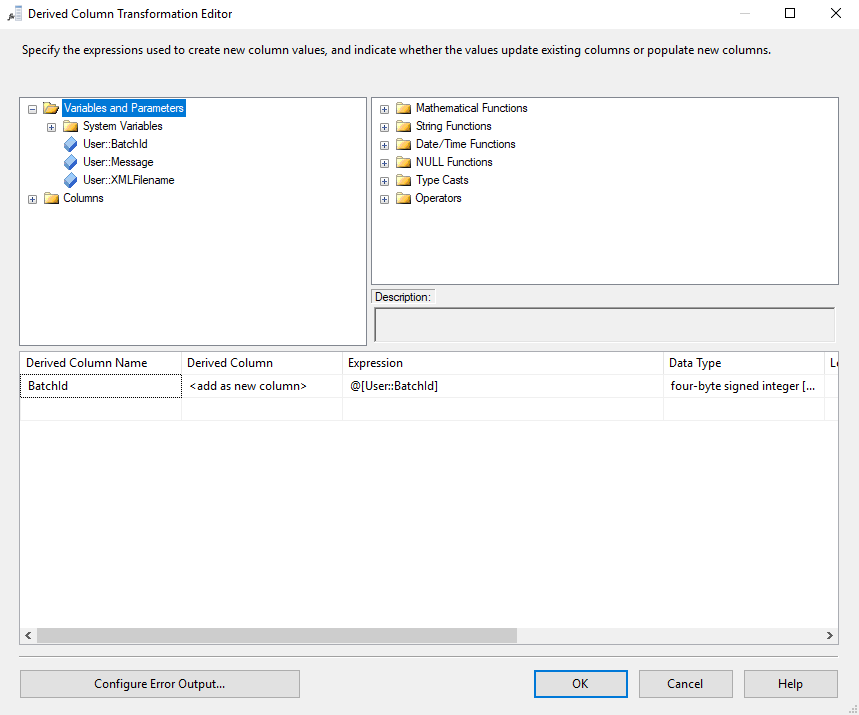
Next up, add the BatchId value to both the Person and Address sets. This is easily accomplished with a Derived Column Transformation. This is what it looks like for Person. The Address derived column is the same.
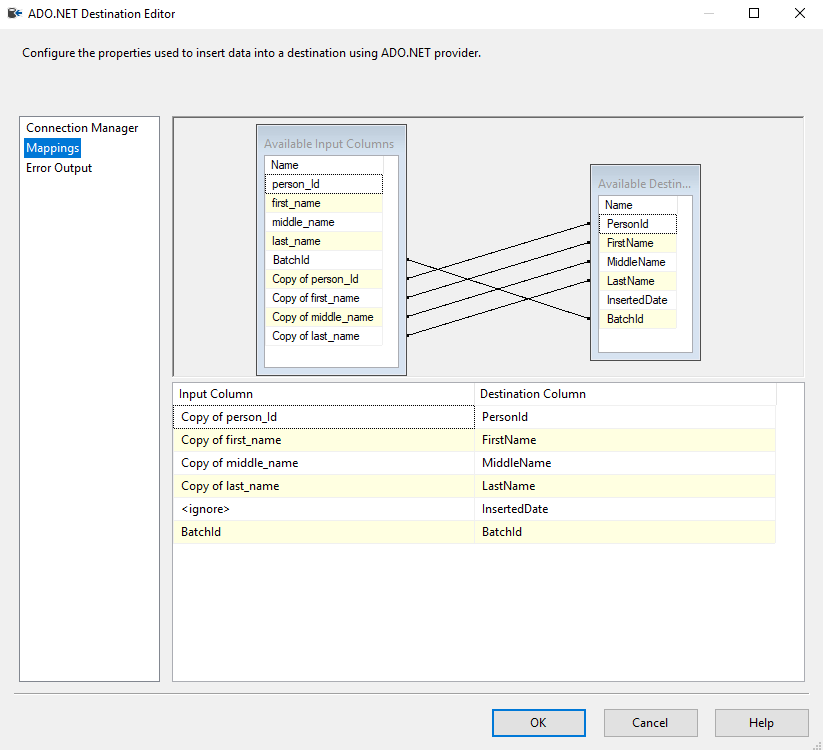
Finally, we are ready to store our data. Create two ADO.NET Destinations, one for Person and one for Address. This is what the mappings for Person should look like. Map your in-memory variables to your database columns.
The following is the completed data flow task.
Step 4: The Final Result
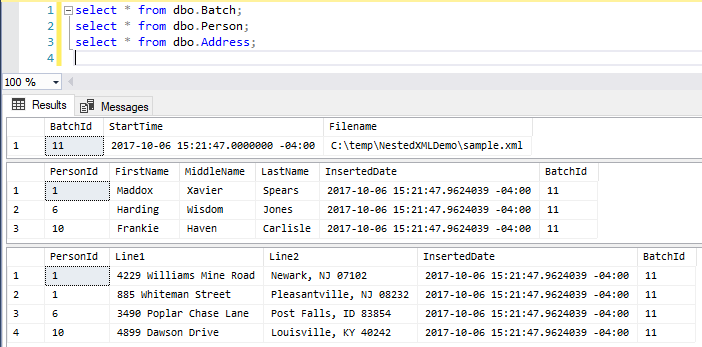
Let’s fire up SQL Management Studio and check out the results.
The source code is available on Github. Both the SSIS job and the SQL database project are available for you to review.

